
So in my last post on this topic I had set-up the htaccess file that will automatically redirect every URI request in that folder to a generic PHP file. This file will then grab the page name and then present a ICS file back to the client that has been customised with the students timetable.
So lets get straight into it.
First I want to grab just the page name so I can use it to look up the student record.
//Lets track down the URI
$uri = $_SERVER['REQUEST_URI'];
$key = ""; //blank key variable

//Split out the item and grab the page name
$uri_array = explode("/", $uri);

//Find the key from the URI.
foreach($uri_array as $ua) {
	//Check for the .ics ext
	if(strpos($ua, ".ics") > 1) {
		//Set the key variable.
		$key = substr($ua, 0, strpos($ua,".ics"));
	}// if strpos
} //foreach
Ok. Now that is out of the way, we take that key and look up the student information from it.
$sql = "SELECT * FROM `students` WHERE `student_key` = '$key' LIMIT 1";
$results = mysql_query($sql)
	or die("Error getting student information");
$row = mysql_fetch_array($results);
Great. Now I know who we are looking at. Next step is to start outputting the ICS file to the client.
echo "BEGIN:VCALENDAR\r\n"; //Start
echo "VERSION:2.0\r\n"; //Version
echo "PRODID:-//My Book It//MBI Calendar v1.0//EN\r\n"; //This is version 1 of the MBI Calendar
.....
//Set the timezone settings
echo "BEGIN:VTIMEZONE\r\n";
echo "TZID:Australia/Brisbane\r\n";
echo "BEGIN:STANDARD\r\n";
echo "TZOFFSETFROM:+1000\r\n";
echo "TZOFFSETTO:+1000\r\n";
echo "TZNAME:AEST\r\n";
echo "DTSTART:19700101T000000\r\n";
echo "END:STANDARD\r\n";
echo "END:VTIMEZONE\r\n";
There are a few more items that you can place into the setup to help clients etc along. There is a heap of information about the standard at http://www.kanzaki.com/docs/ical/
Next step is to get all of the calendar items for the student. I am not going to go into depth on this query as it would be HUGELY different for each site. Once you have all of these items, we can start to output them to the client via a loop or similar.
//Begin the event
echo "BEGIN:VEVENT\r\n";
//Create a UID. This needs to remain the same. I have used the date of the class plus the class record ID, followed by @ domain.
echo "UID:" .gmdate("Ymd", strtotime($class_time)) ."T" .gmdate("His", strtotime($class_time)) ."Z-" .$row['id'] ."@" .$_SERVER['SERVER_NAME'] ."\r\n";
//Time script was generated
echo "DTSTAMP:" .gmdate("Ymd", strtotime($row['now'])) ."T" .gmdate("His", strtotime($row['now'])) ."Z\r\n";
//Class start time
echo "DTSTART:" .gmdate("Ymd", strtotime($class_time)) ."T" .gmdate("His", strtotime($class_time)) ."Z\r\n";
//Class end time
echo "DTEND:" .gmdate("Ymd", strtotime($class_time)) ."T" .gmdate("His", (strtotime($class_time) + $duration)) ."Z\r\n";
//Title that will appear in the event
echo "SUMMARY:Class\r\n";
//Set the alarm to 30 minutes before the event.
echo "BEGIN:VALARM\r\n";
echo "ACTION:DISPLAY\r\n";
echo "DESCRIPTION:This is an event reminder\r\n";
echo "TRIGGER:-P0DT0H30M0S\r\n";
echo "END:VALARM\r\n";
//End the event
echo "END:VEVENT\r\n";
and finally, close off the calendar
echo "END:VCALENDAR\r\n";
Next thing to do was to test it out to see if it was working correctly. So I pointed my browser over to the test address of http://demo.mybookit.com.au/calendar/QRikK8NkVVrkG5gtwGE8pKNXB.ics which outputted the ics file.
It all looked good and appeared to be correct. To be sure I was on the right track I ran the code past a ICS validator at http://icalvalid.cloudapp.net/ which gave me a perfect score.
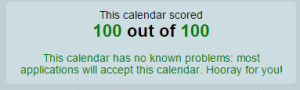
Wow, following the standard sure does work out well.
The last test was to ensure that it updated correctly, so I moved one of Student 7’s classes from 3:00pm friday to 10:00am Tuesday. I then let the calendar update and the appointment had moved correctly.
So that is all there is to it. The final steps is to add it to the actual site so people can click on it to add it to their devices. It should be noted that iPhones work really well with this. You click on the link and it imports straight away. Unfortunately Android phones appear to need a third party app to get it working correctly. I will post more about that when I have had time to look into it completely.