
In my last post I talked about how I have set-up a IPv6 Tunnel to SixXS from my home router. With this all up and running I could now look at getting my LAN clients onto IPv6.
I run a few networks at home, 1 for my general devices, 1 for wireless devices and guests (phones etc), 1 for testing of Windows servers and a DMZ. Given that I have more then 1 network I opted to ask for a /48 from SixXS so I could allocated a /64 to each network. (This seems to be the standard thing to do). So after a week of keeping my tunnel up, I had enough points to requested a /48. This was allocated to me a short time later.
Now that I have all the IP addresses that I could ever need or want, it is time to set-up my home networks using both the original routed subnet and by splitting the /48 into /64’s to be allocated out to the various LANs
In the last post, I did all the configuration via the command line. This time I am going to swap over and do it via the Web GUI.
The first thing to do is to create all the objects that I need. To do this I logged into the D-Link and went to the Objects menu.
I have created myself a IPv6_Tunnel folder to place all of the IPv6 objects into and create the following objects.
- IPv6_Tunnel_Subnet: 2001:4830:1200:808d::/64
- IPv6_lan_ip: 2001:4830:1200:808d::
- IPv6_lan_network: 2001:4830:1200:808d::/64
- IPv6_guest_ip: 2001:4830:121f:1::
- IPv6_guest_network: 2001:4830:121f:1::/64
- IPv6_tunnel_48_network: 2001:4830:121f::/48
- IPv6_Local_subnets: Group with IPv6_Tunnel_subnet and IPv6_tunnel_48_network as members.
Now all of the objects are setup, I need to get my clients onto the network. To do this I am going to use DHCPv6 to allocated IP’s to clients.
The setup of DHCPv6 servers is a piece of cake, just nagivate to Network –> Network Services –> DHCPv6 Servers.
Each server was easy to set-up. When promoted provide a name (IPv6_lan_dhcp), and interface (lan), and a /64 object (IPv6_lan_network)
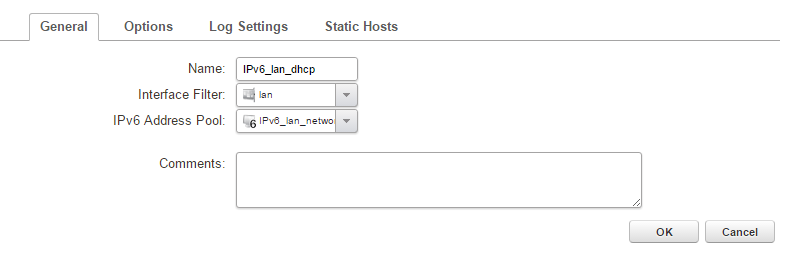
Change the options to the following
- Send Unicast Option: Checked
- Handle Rapid Commit Option: Checked
- Send Preference Option: Checked
- Preference value: 100
The only other thing that is worth doing, is to allocate a static host address for the lan interface. (Host: IPv6_lan_ip to the MAC address of the lan interface). This will ensure that the first IP allocated will be 2001:4830:1200:808d::1 rather then 2001:4830:1200:808d::
Once the DHCPv6 Servers are set-up, your clients on the networks should start to receive an IPv6 address in the range allocated. Now to get them access to the Internet we need to set-up Router Advertisements for the networks.
This is a good moment to stop and point out a big difference here. In IPv4 the gateway is allocated via DHCP using option 003. In IPv6 you need to use router advertisements which is a very different way of thinking.
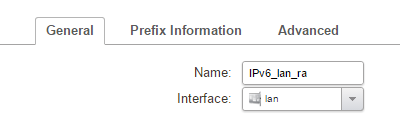
To set up one, navigate to Network –> Routing –> Router Advertisements
Provide the information required (Name and interface) and then select Prefix Information
Click on the Add Button and select Prefix information. Again provide a Name and the network that this prefix will apply to (in this case IPv6_lan_network). I used the same network object as the DHCP server to make things easy if I wanted to update them in the future. (This way it updates both at the same time)
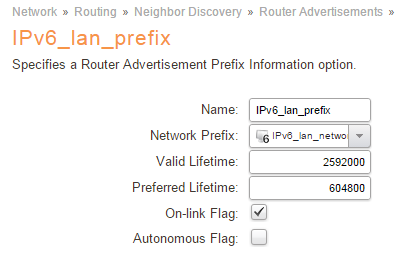
Check the On-Link Flag and disable the Autonomous flag option and save that prefix.
The last thing is that there are a few settings which D-Link recommend you change in the advanced section which you can see in the screenshot below.

Now that that is all set-up there are just two more changes that need to be make to ensure everything works successfully.
The first is to change Multicast Hop Limit Min to 1 in System –> Advanced Settings –> IP Settings.
The last thing to create is a rule to allow the traffic to cross the device. I used the following settings, but they could be either more or less restrictive based on your needs.
- Name: IPv6_allow_standard
- Action: Allow
- Source Interface: IPv6_Interfaces (Group with lan and guest as members)
- Source Network: IPv6_Local_Subnets (Group)
- Destination Interface: IPv6_My_6in4_tunnel (Created in the previous post)
- Destination Network: all-nets6
- Service: all_services
That should be everything you need to get it working. The next step is check that the machines are recieving their addresses correctly and perform a test connection. (ping www.google.com /6)
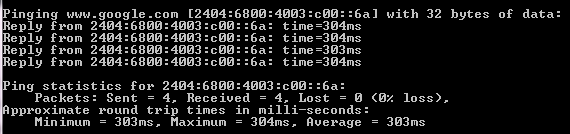
And there you have it. IPv6 deployed across two networks (if you repeat the process for the guest network). I am going to look at adding it into the other networks at a later date but the process is fairly similar.
In my next post, I will review a few of the gotchas and just a bit of my thoughts about the transition that you may find helpful if you are doing the same move.